
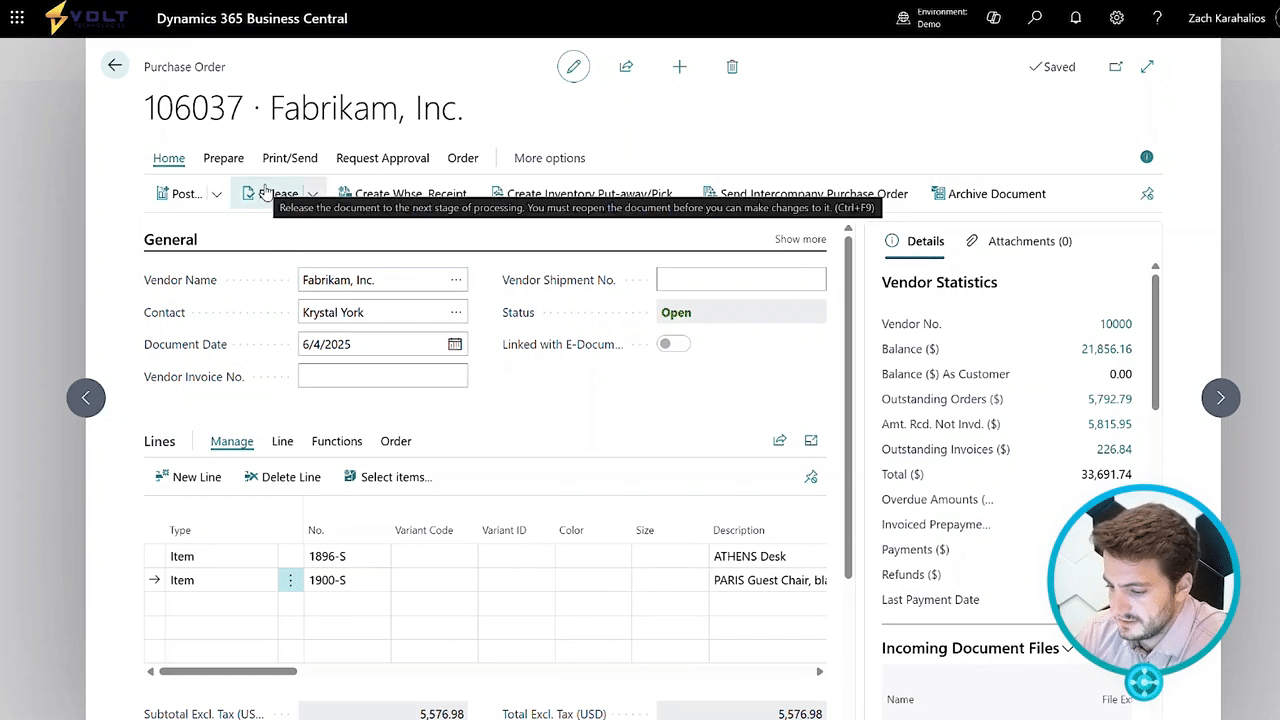
Managing purchases is a huge part of running your operations smoothly. Today, within this demonstration, I'm going to show you the process of creating purchase orders, releasing purchase orders, confirming purchase orders, and then finally receiving and putting those purchase orders away within your warehouse. Let's jump into Dynamics three sixty five Business Central. Here we're looking at our home screen or the role center page of d three sixty five Business Central. From here, you'll see that I easily have purchase orders favorited on my home screen so I can get here at the click of the button. You always have the ability to search for purchase orders or just go into your purchasing module and go to a purchase order. Additionally, you do have the ability to start with a purchase quote and convert that quote into an order, but for today's demonstration, we're gonna focus on just purchase orders. When I click into this screen here, I'm gonna see all sorts of information on my current open and released purchase orders. You'll see my saved views on the left left where I can see things like pending confirmation, upcoming orders, outstanding, partially invoiced, received not invoiced. I have all sorts of filters that I can, utilize, cut, slice any way I'd like to see. I have my vendor number, my buy from vendor number, vendor authorization number, my location. So where am I receiving this in? I always have the ability to personalize this screen as well. So maybe I wanna go ahead and remove the vendor auth this authorization number, or I don't need need to utilize this assigned user ID. That's no problem at all. We can quickly hide, press done. So that gives you the flexibility to customize these screens any way you'd like. The next step here is as simple as just clicking new. What this is going to do is go ahead and create a purchase order. The first thing we need to do is enter in that vendor name. So I'm going to use our demo data here of our Fabrikom Inc vendor. Once the vendor's name is entered, all of their default information will show up. We can see things like their vendor number, their address, the city, state, zip, our contact information, document date, posting date, due date, vendor invoice number, all sorts of information that defaults directly from that vendor card. Moving down we have our line level information this is where I can manually start to add items. So for example, I'm going to add the Athens desk. I'm going to go ahead and also add this Paris guest chair. The next step is entering in our quantities. So I'm going to go with a quantity of five for the desk and ten for the chair. You'll notice that we can see the direct cost that we usually utilize when purchasing these items and then the total based off the quantities that have been entered. If we scroll down we can see our subtotal so actually summing up the two items and then we can see the unit of measure we're purchasing in as well as where we're receiving that inventory into. Once we've entered in our information the next step is to confirm the purchase order with the vendor. That's as simple as just releasing the order. This is something that can be done manually or automatically through a batch job. Once the order has been released to the vendor, it's been confirmed, we await to actually receive that inventory into our warehouse. So obviously days, weeks, months could go by. Once that inventory has actually shown up to the warehouse, the next step is to receive and put that inventory away. There's several different routes you could go here. It could be a simple receipt into a location. There could be a directed put away based off parameters you have set up. We could even do cross docking scenarios. For today, we're gonna keep it fairly simple and just utilize what's called a warehouse receipt. We'll click our create warehouse receipt button, and it's gonna go ahead and navigate me to the warehouse receipt screen where I can see things like the purchase order number, the items that we're receiving in, the quantities. This is where we can go ahead and do quality inspections. We could over receive. We could under receive. We could create multiple receipts upon one order. We're gonna keep it simple here today again and just go ahead and say, hey. In this step, we've actually received in this inventory and we'll post that receipt. Now our inventory has been received in. We can scroll to the right to see that we've received in five of the chair and ten of the desk and then we have our quantity remaining to invoice. So at this point, we would be waiting for the invoice to come in from our vendor. Once that invoice comes in, we can go ahead, post, click invoice since we've already received in that information, and this will close out the order. So now we've received in all of our inventory, we've invoiced the order, and we're gonna go ahead and post the invoice. It's taken me to my posted sales invoice where I can go ahead and see information like the totals, the quantities, the dates, when it was corrected, or if I need to make corrections or update the document I can do that from here. Thanks for following along with the demonstration today. If you have any questions about purchase orders or anything to do with Dynamics three sixty five Business Central, please reach out to us here at Volt Technologies. Thank you.
In this demonstration, the process of creating purchase orders in Dynamics 365 Business Central is showcased. The main character highlights the ease of accessing and managing purchase orders, including the ability to convert purchase quotes into orders. After entering vendor information and adding items, the purchase order can be confirmed and released to the vendor. Once the inventory is received, quality inspections can be performed, and the order can be closed upon invoicing.
The video concludes with an invitation for viewers to ask questions about purchase orders or Dynamics 365.
